* The following example describes the procedure for setting the "member registration completed e-mail." The procedure for other e-mails is the same so refer to this procedure.
Procedure
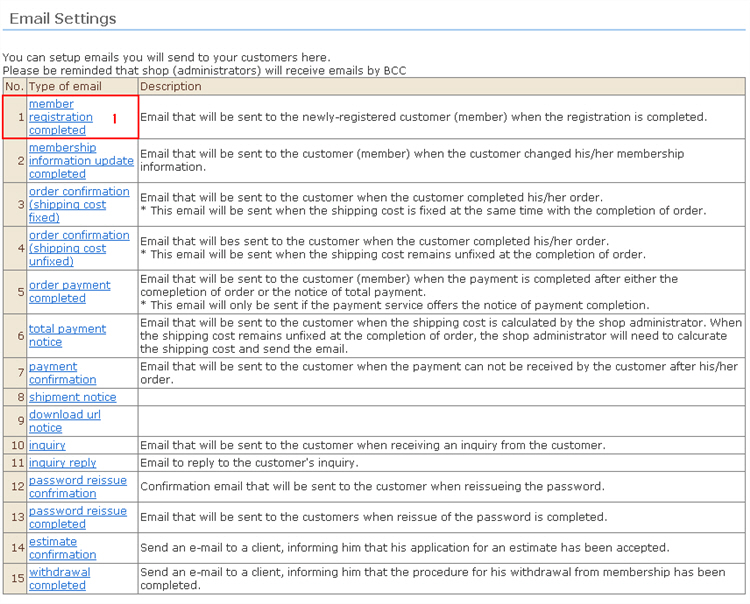
1. Click [Member registration completed].
No.3. Order confirmation (shipping cost fixed)
4. Order confirmation (shipping cost unfixed)
5. Order payment completed
6. Total payment notice
7. Payment confirmation
8. Shipment notice
9. Regarding the download URL notice, you can confirm the sent mail log in the customer's received orders screen.
2. Enter the e-mail information.
(1) Enter the sender's e-mail address and BCC (person in charge's e-mail address). 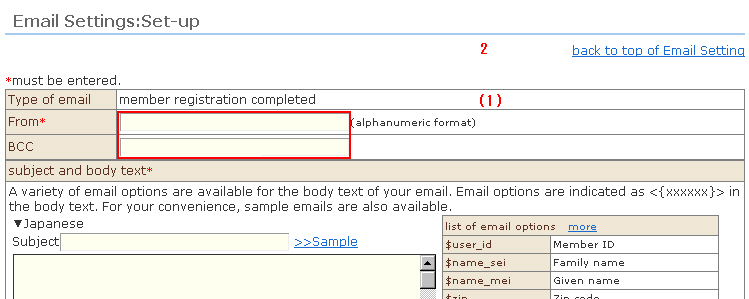
※ If two or more persons in charge want to receive e-mails, enter the e-mail address delimited by commas. Up to five persons in charge can be specified.
* When the e-mail address of a cellphone (so-called "feature phone") has been set as BCC, text might be corrupted since multilingual text code "UTF-8" is not supported on some cellphone models.
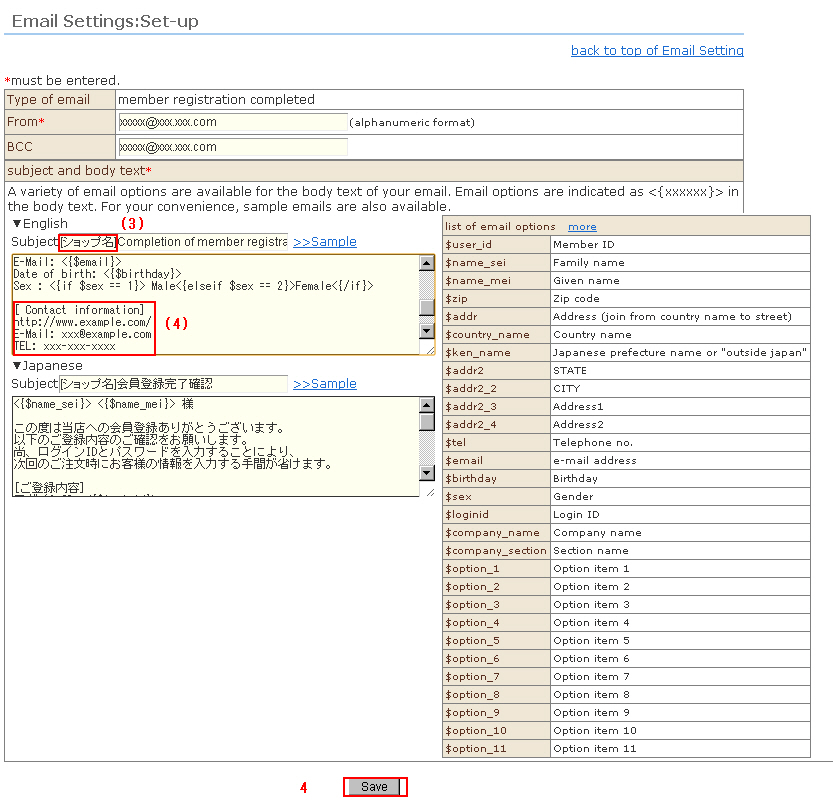
3. Enter the subject and content.
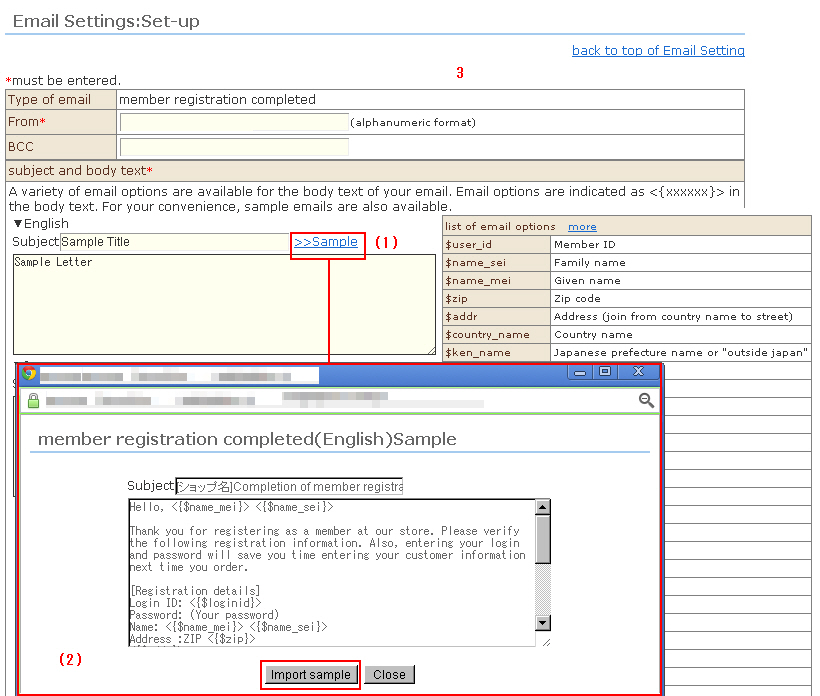
How to enter using sample e-mails
(1) Sample e-mail text pops up on screen in the respective language by clicking >> Sample to the right of the subject.
(2) Clicking the [Import sample] button imports the sample e-mail.
Click the [Close] button to close the sample e-mail text in the screen popup.
(3) Edit the [Shop name] in the subject field.
Edit the [Shop name] onwards at the end of the content field.
* E-mail variables can be used in subjects and content.
The part <{xxxxxx}> is an e-mail variable.
When e-mail variables are used, the content of the e-mail is automatically swapped with the information of each individual customer.
Each e-mail sample is designed so that variables can be combined and standard auto-response e-mails can be output.
If there is a non-conformity in the customized content, member registration or received order processing sometimes can no longer be performed normally. Before customizing variables, be sure to make a backup and check operation after the e-mail has been edited.
4. Click the [Save] button. This saves the details you have entered.